Homemade Bagels Recipe
Hey there, breakfast lovers and bread enthusiasts! Are you ready to embark on a baking adventure that’ll make your Sunday mornings infinitely more delicious? Today, we’re diving into the world of homemade bagels.
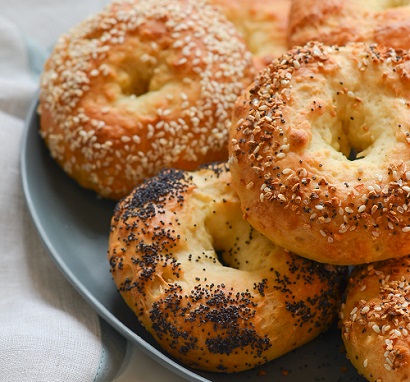
That’s right, those chewy, glossy rings of pure joy that you thought only came from your favorite New York-style deli. Well, my friends, prepare to have your minds blown because you’re about to become a bagel boss in your very own kitchen!
Now, I know what some of you are thinking: “Bagels? From scratch? Isn’t that like super complicated?” I hear you. For the longest time, I thought bagels were one of those mystical foods that only professionals could make.
But let me tell you, once I tried it, I realized it’s totally doable. And the rewards? Oh man, biting into a warm, freshly boiled and baked bagel, with that perfect balance of chewy inside and crispy outside – it’s like a breakfast epiphany!
So, what makes a bagel a bagel? It’s not just the shape, my friends. The key is in the process. Unlike your typical bread, bagels take a little swim in boiling water before they hit the oven. This pre-bake bath is what gives them that distinctive chewy texture and shiny crust.
It’s a bit like the bagel equivalent of hitting the gym and getting a spray tan before a big event. They come out looking good and feeling tough!
Now, let’s talk New York-style bagels for a sec. These are the gold standard, the bagel all other bagels aspire to be. They’re known for their slightly crispy exterior, dense but not too dense interior, and a flavor that’s just, well, bagel-y.
It’s a combination of the high-gluten flour, the boiling step, and maybe a little bit of that New York water magic. But fear not! You can achieve bagel greatness right in your own kitchen, no matter where you are.
Ready to roll (pun intended)? Here’s what you’ll need for our homemade bagels:
Ingredients:
- 4 cups high-gluten flour (bread flour works too)
- 2 teaspoons salt
- 1 tablespoon sugar
- 2¼ teaspoons (1 packet) active dry yeast
- 1¼ cups warm water (about 110°F)
- Optional: 1 tablespoon barley malt syrup (for extra authenticity)
- Toppings: sesame seeds, poppy seeds, everything bagel mix, etc.
For boiling:
- 2 quarts water
- 2 tablespoons honey or barley malt syrup
Alright, let’s break this down step by step:
Wake Up the Yeast: In a small bowl, mix ½ cup of the warm water with the sugar (and barley malt syrup if using) and yeast. Let it sit for about 5 minutes until it gets foamy. It’s like coffee for yeast – gets them all perky and ready to work!
Make the Dough: In a large bowl (or your stand mixer if you’re fancy), mix the flour and salt. Add the yeast mixture and the remaining ¾ cup water. Mix until you get a stiff dough. This isn’t your soft, pillowy pizza dough. Bagel dough is a workout!
Knead, Baby, Knead: Turn the dough onto a lightly floured surface and knead for about 10 minutes by hand (or 7 minutes in a mixer). You want it smooth and elastic. It’s like stress relief and bagel prep in one!
First Rise: Place the dough in an oiled bowl, cover with a damp towel, and let it rise in a warm spot for about an hour. It won’t double like crazy – bagel dough is too tough for that. But it should puff up nicely.
Shape Your Bagels: Punch down the dough (so satisfying!) and divide it into 8 equal pieces. Now, you’ve got two options for shaping:
Roll each piece into a rope and join the ends to form a ring.
Or, my favorite: poke a hole in the center of each ball with your thumb and gently stretch it out. It’s like making dough doughnuts!
Second Rise: Place your shaped bagels on a parchment-lined baking sheet, cover, and let them puff up again for about 15-20 minutes.
Preheat and Boil: Preheat your oven to 425°F (220°C). Meanwhile, bring your water and honey/malt to a boil in a large pot. This sweetener isn’t just for flavor; it helps give your bagels that classic shiny crust.
Bagel Bath Time: Lower 2-3 bagels at a time into the boiling water. They’ll float, so give them 1 minute on each side. This step is crucial – it’s what makes a bagel a bagel! Drain them and place back on the baking sheet.
Top It Off: Now’s the time to add your toppings. Dip the wet bagels into your seeds or everything mix. They’ll stick better now than after baking.
Bake to Perfection: Pop those beauties into the oven for about 20-25 minutes, until they’re golden brown. Your kitchen will smell like a New York deli!
The Hardest Part: Let them cool on a wire rack for at least 15 minutes. I know, the wait is torture, but it lets the inside set so you don’t end up with gummy bagels.
And there you have it, my friends! You’ve just made honest-to-goodness, New York-style bagels in your own kitchen. Take a moment to bask in your achievement – that shiny crust, those perfect holes. You’re not just a baker now; you’re a bagel artisan!
Now, let’s talk about how to enjoy these bad boys. First, please, for the love of all things delicious, try one slightly warm with a schmear of cream cheese. Close your eyes, take a bite, and bam! You’re practically on the streets of Manhattan. But don’t stop there. These homemade bagels are a perfect canvas for all sorts of deliciousness.
Go classic with lox, red onion, and capers for a brunch that’ll impress even your most discerning friends. Or how about a breakfast sandwich with a fried egg, avocado, and a slice of sharp cheddar? It’s a morning game-changer. And don’t even get me started on how perfect these are for a PB&J. That chewy bagel texture takes it to a whole new level.
Now, what if things don’t go exactly as planned? Maybe your bagels aren’t perfectly round, or they didn’t get as puffy as you’d hoped. Don’t sweat it! Even professional bagel shops have some “rustic” looking ones. It’s part of the charm. If they’re a bit flat, you might need to knead a bit longer next time to develop more gluten. And if they’re too tough, you might’ve overworked the dough. Remember, bagel dough is strong, but it’s not invincible.
Let’s geek out for a second on the science of bagel-making. The magic lies in the high-gluten flour. More gluten means more chewiness, which is what makes a bagel different from, say, a dinner roll. The boiling step is also key. It gelatinizes the starch on the surface, creating that signature crust. Plus, the alkaline environment (thanks to the bit of honey or malt) encourages browning, giving you that gorgeous golden color.
And can we talk about the hole? It’s not just for looks or to save dough (pun intended). The hole helps the bagel cook evenly by increasing the surface area. Plus, historically, it made them easier to thread onto strings or dowels for transport and display. Bagels have been street food since way before food trucks were cool!
Now, I know some of you might be watching your carbs or trying to eat healthier. Good news! You can experiment with whole wheat flour for part of the mix. Just remember, whole grain flours absorb more water, so you might need to adjust. And honestly, a homemade whole wheat bagel is still going to be leagues better than some store-bought “healthy” option loaded with preservatives.
One last pro tip: bagels freeze beautifully. Make a big batch, slice them before freezing, and you’ve got instant breakfast for busy mornings. Just pop a frozen half in the toaster, and it’s almost as good as fresh. Your future self will thank you when you’re rushing out the door with a homemade bagel sandwich in hand.
In a world where we’re often rushing from one thing to the next, there’s something wonderfully grounding about making bagels. It’s a process that can’t be rushed, a delicious reminder to slow down and enjoy the journey. Plus, in an age of sourdough one-upmanship (which, don’t get me wrong, I’m totally here for), there’s something refreshingly unpretentious about a good bagel.
So, whether you’re making these for a lazy weekend brunch, to wow your colleagues at the next meeting (bagels > donuts, just saying), or just because you deserve something special, I hope this recipe brings you joy. Remember, it’s not just about the end result, though trust me, everyone will be impressed. It’s about the process – the therapeutic rhythm of kneading, the anticipation as they bake, and the pure pleasure of sharing something homemade.
Now, go forth and bake! Fill your home with the irresistible aroma of fresh bagels. And when you bite into that first chewy, golden ring, take a moment to savor your achievement. You’re not just a baker; you’re a keeper of traditions, a creator of New York-style magic right in your own kitchen. Happy baking, and even happier eating!